Aluminum Self-Adhering Panels for Solar Panel Perimeters
Description
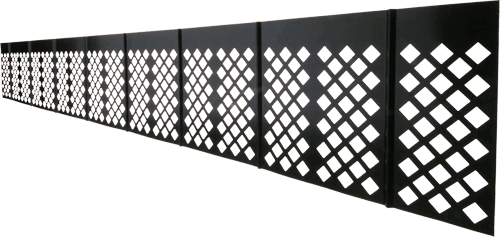
The SolaTrim Pest Abatement Barrier is an aesthetic, all-weather, long lasting Pest and Debris abatement system designed to limit environmental impact and pest intrusion to residential solar system arrays. SolaTrimTM specifically blocks pigeons and squirrels from getting under solar systems while allowing for air to circulate underneath the solar panels, maintaining a protected area between the roof surface and the bottom of the solar panels.
Modern Adhesive Technology now allows for permanent bonding without the use of rivets, screws or other mechanical fasteners. SolaTrimTM applied this remarkable “peel and stick” feature to our barrier panels, making it possible to attain “life of the system” protection with a single, simple installation process.
Features
Rust and Corrosion resistant 3003-H14 Aluminum panel
Black polyester coating for low-visibility, matching module backing
Backside primer coat (standard gray)
.025″ Aluminum stock – stiffened by design to prevent barrier from bending or warping
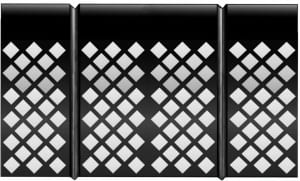
Diamond stamping to allow for air-flow and temperature regularity
Acrylic foam tape backing for permanent adhesion to any module frame configuration
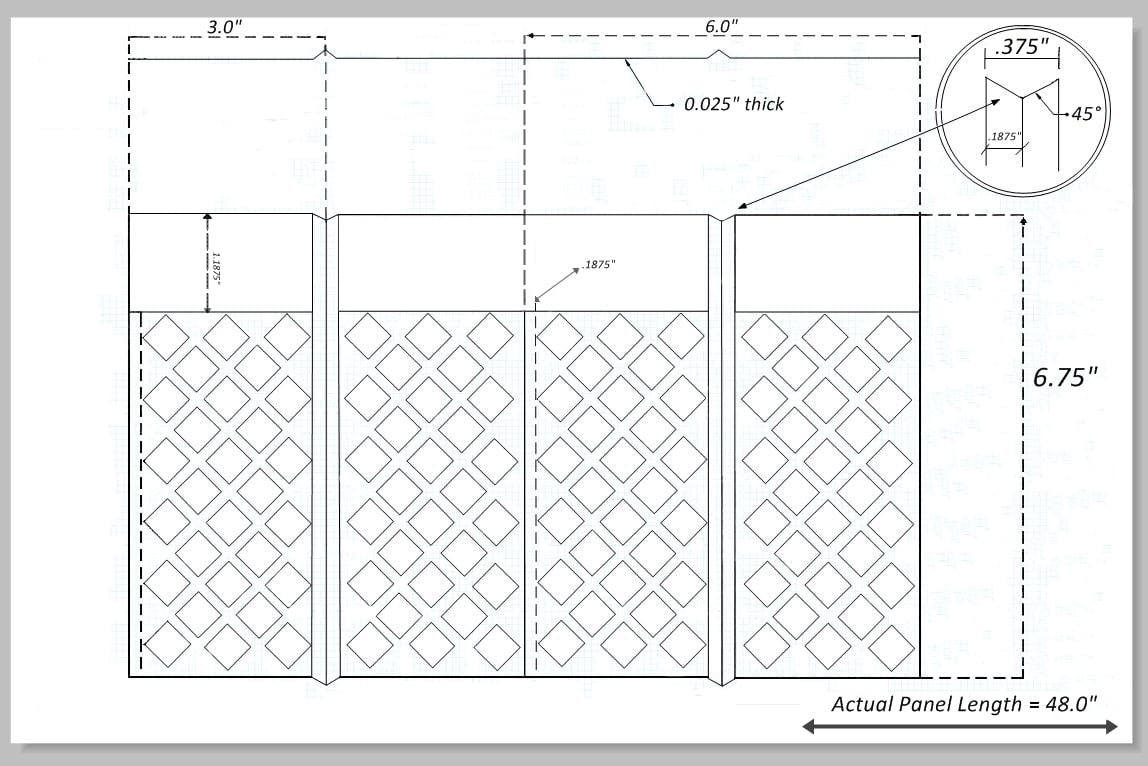
ST-675 Specifications
Physical
Dimensions (H x W)
6.75″ x 48.00″
Weight
0.68 lbs.
Finish
Black Polyester Coating
Environment
Ambient Temperature (post installation)
-40°F to 300°F
-40°C to 149°C
Relative Humidity (installation only)
<90%
Storage
>50°F/10°C (prior to installation)
Installation
>40°F/4°C
Warranty
Warranty
24 Months
Product Dimensions
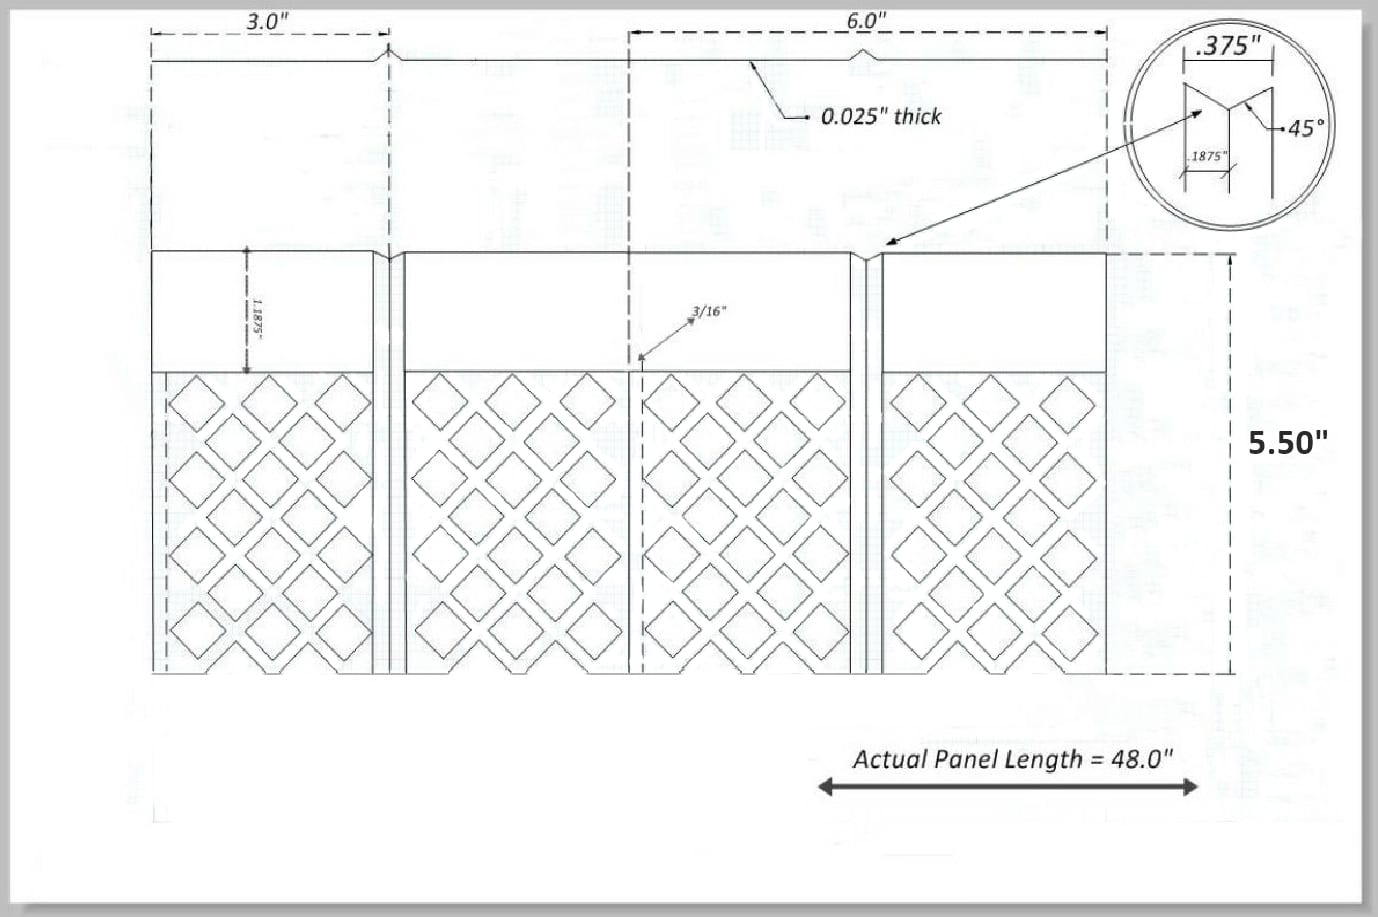
ST-550 Specifications
Physical
Dimensions (H x W)
5.50″ x 48.00″
Weight
0.55 lbs.
Finish
Black Polyester Coating
Environment
Ambient Temperature (post installation)
-40°F to 300°F
-40°C to 149°C
Relative Humidity (installation only)
<90%
Storage
>50°F/10°C (prior to installation)
Installation
>40°F/4°C
Warranty
Warranty
24 Months
Product Dimensions
Installation Instructions
Tools Needed:
Metal shears to cut .025″ thick aluminum
Tape Measure
Clean cotton cloth
(Optional) Scribe w/ white or yellow marker
Materials Needed:
Acetone Wipes (provided in SolaTrim carton)
For Best Results fitting, cutting and affixing SolaTrim to the Solar Array, please follow the directions listed below:
Solar Module frames must be free of dust, debris or any foreign particles. Use the Acetone wipes provided to prepare the frames for SolaTrim’s peel and stick adhesive. Each wipe should be adequate to prep 10-30 feet +/- of module frames. The acetone will dry in a few seconds. If frames have built-up surface dirt and/or residue, wipe with a wet cloth and dry before prepping with the Acetone wipe.
When applying SolaTrim, start at the 90° corners of the array and work toward the center. Wherever possible, place full length sections of SolaTrim around the corner edges of the modules, bending at the stiffener.
Scribe the SolaTrim pieces against the rooftop material profile so the top of the SolaTrim panel will be near or flush to the top of the module frame after sizing.
Cut the SolaTrim piece to fit with tin snips or lightweight electric metal shears.
Dry-fit the piece before peeling off the adhesive to check for proper sizing. (Note: SolaTrim pieces do not need to make contact with the roof surface; gaps of +/- 1/4″ are acceptable and still provide protection from pest intrusion.
After dry-fit, peel the layer off the adhesive strip and press the SolaTrim piece against the module frame. Apply pressure to achieve minimum 15lbs PSI with gloved hands or roller tool along the length of the frame or rub the frame with cotton cloth with sufficient pressure to help the adhesive “wet out” on the frame surface*. SolaTrim will stay in place immediately, will reach 80% adhesion in 20 min and 100% adhesion in 72 hours.
If SolaTrim needs to be temporarily removed, simply pull a razor knife blade down the adhesive bead between the module frame and the SolaTrim panel. Pull lightly on the SolaTrim panel and it should pop off. Replace with a new panel using standard installation method.
Replacement SolaTrim panels may be ordered through SolaTrim. Call your SolaTrim distributor or write to info@solatrim.com and specify replacement quantity.
*We do not recommend installing SolaTrim at ambient temperatures below 40F (4.4C). Between 40F – 50F, use a J-roller / laminate roller to increase activation pressure.
SolaTrim Cold Weather Storage and Installation Recommendations
Storage:
For Best Results, store this product in a climate controlled area between 45°F to 100°F (7°C to 38°C) and 0-95% relative humidity. Under these conditions, SolaTrim Adhesive should retain its properties for up to 24 months.
Note: When planning to install SolaTrim in an ambient temperature environment between 40°-50°F (4.4°- 10°C), SolaTrim is best used when stored at room temperature before application.
Tips:
Instead of butting SolaTrim panels together, try overlapping the panels 3″ so the diamonds are lined up. This looks great and prevents flaring or separation at the panel joint.
Installation:
The ideal range is 70° – 100°F / 21° – 38°C.
In these conditions, normal Installation methods apply.
IMPORTANT! The lowest recommended temperature for SolaTrim application is 40°F / 4°C. Attempts to install SolaTrim below this temperature may result in unsatisfactory adhesion.
3M VHB tape is pressure-activated and requires a minimum 15lbs PSI for the adhesive to “wet out” and achieve the strongest bond. While we believe, under normal conditions, this PSI threshold can be reached manually, for colder weather, a laminate roller or “J-roller” should also be used to increase the pressure on the SolaTrim adhesive to insure adequate adhesive activation spread over the solar module frame.*
*This prescribed application process has been tested and deemed effective under similar conditions.